
This post is intended for those who want to get started with GitHub. There are several blogs/articles that explain git commands and several that describe software lifecycle. This shows the relation between the two and how to use them with VS Code. It covers the essentials and by using GitHub you will learn more.
GitHub Concepts
If you are already familiar with it, you can skip this section. The source in GIT can have one or more branches. To begin with, there is a main (used to be called master) branch and one or more feature and bug branches. The main branch is used to build software that is released. The other branches are used to develop features or fix bugs that are not yet released. Each branch has local version and remote version. When a developer wants to add a feature or fix a bug, s/he would create a local branch from the main, make changes to it, push changes to remote and then create a pull request (PR) to merge changes in the main branch. After the request is approved, the changes merge in the main branch.
Setup
From the VS Code -> Terminal menu:
- Select New Terminal
- Select Powershell
- Run git command. If it runs, your set up is done.
The remaining post describes various lifecycle operations that a developer commonly performs and the corresponding commands.
Getting Started
The software development starts by either by creating a new repository or cloning an existing one.
Creating a new one
I would recommend creating a repository on the remote first i.e. here
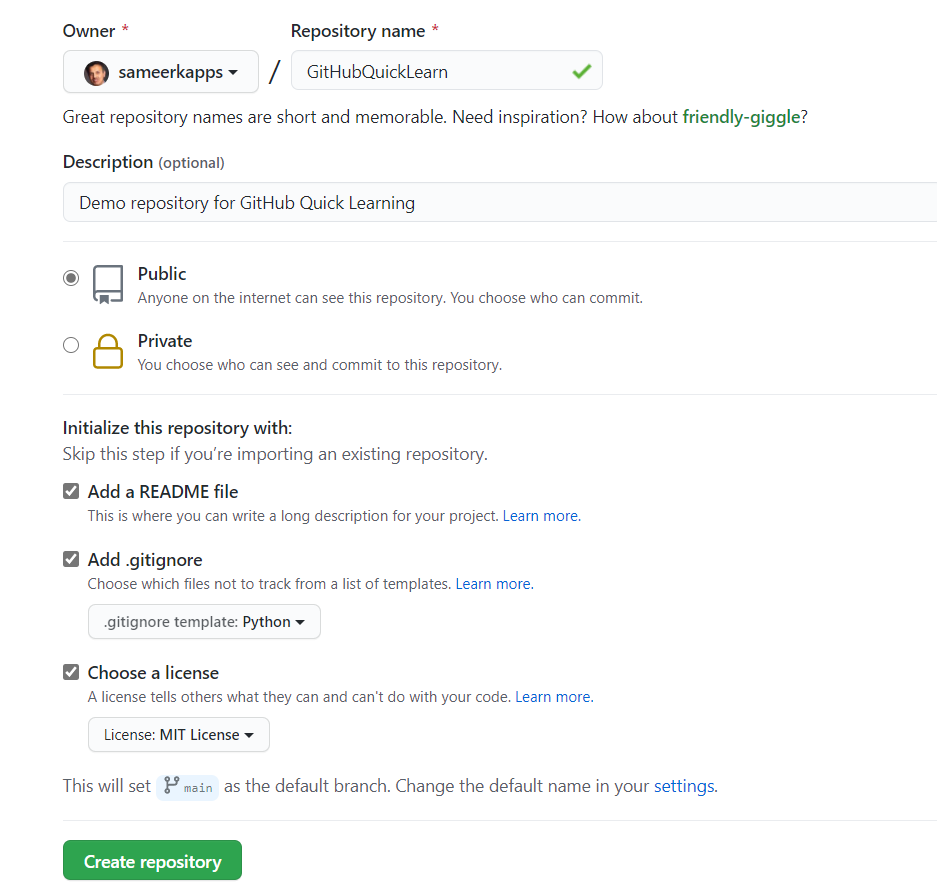 It is good to have Readme file describing the repository and for documenting the software.
Choose a .gitignore template based on the development language you choose.
It is good to have Readme file describing the repository and for documenting the software.
Choose a .gitignore template based on the development language you choose.
Once you create a new repository, note its URL. In this case:
https://github.com/sameerkapps/GitHubQuickLearn
Now you have created a repository, follow the steps in the Cloning a Repository section to clone it on your local machine.
Cloning a Repository
Several times a repository already exists on the GitHub. You need to clone it on your local machine to work on it.
Create a folder on your machine to host the repository.
Get the URL of the repository and run the following command with appropriate URL.
git clone --recursive https://github.com/sameerkapps/GitHubQuickLearn
It will show message like this.
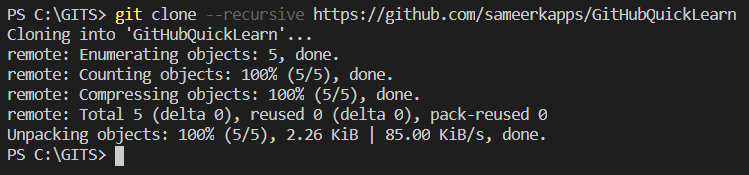
This will create a subfolder with the repository name in this case "GitHubQuickLearn". It will have copy of the files from the GitHub.
Now you are ready to develop.
Development
The development cycle typically goes like this

You have already cloned the main to your local machine in the previous step. In order to do develop a feature, you want to create a local branch.
Create Local Branch
In Powershell, to the subfolder ("GitHubQuickLearn") that was created by git clone command. Now create a new branch "feaure/helloworld" with the following command
git checkout -b feature/helloworld
It will show message as follow.

Develop
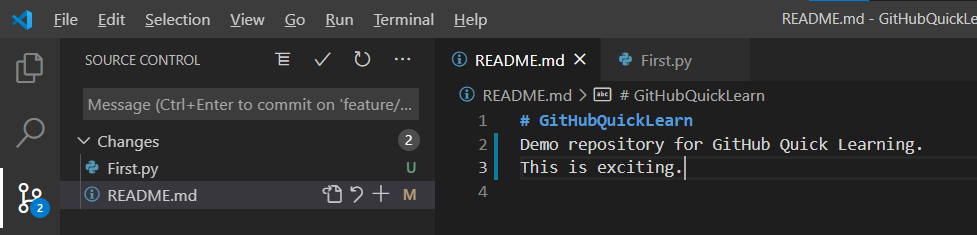
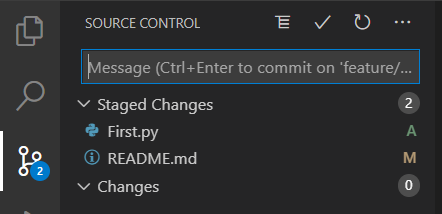
Now your development will be in the new branch. Open the folder using VS Code for development. For example, if you added a file (First.py) and modified another one (Readme.md) and you are ready to check-in, click on the source control symbol on the left:
Push to Local
To stage your changes, hover over the "Changes" title bar. It will show you the + button with a tool tip to stage all changes:
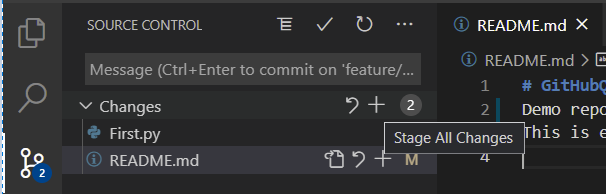
Click on the + to stage the changes. Enter a commit message describing the changes:
Click on the checkmark at the top. Your changes are now in the local branch. However, they are not yet in the remote branch.
Push to Remote
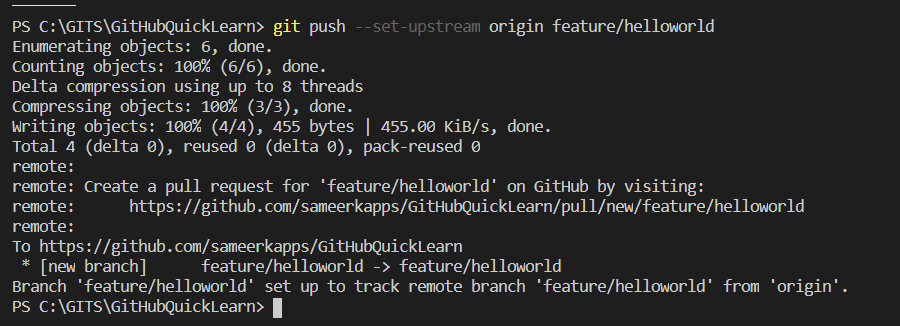
To push the changes to the remote branch on the GitHub, execute the following command:
git push --set-upstream origin feature/helloworld
It will create a remote branch on GitHub (if it does not exist) and push the changes there, with the following message:
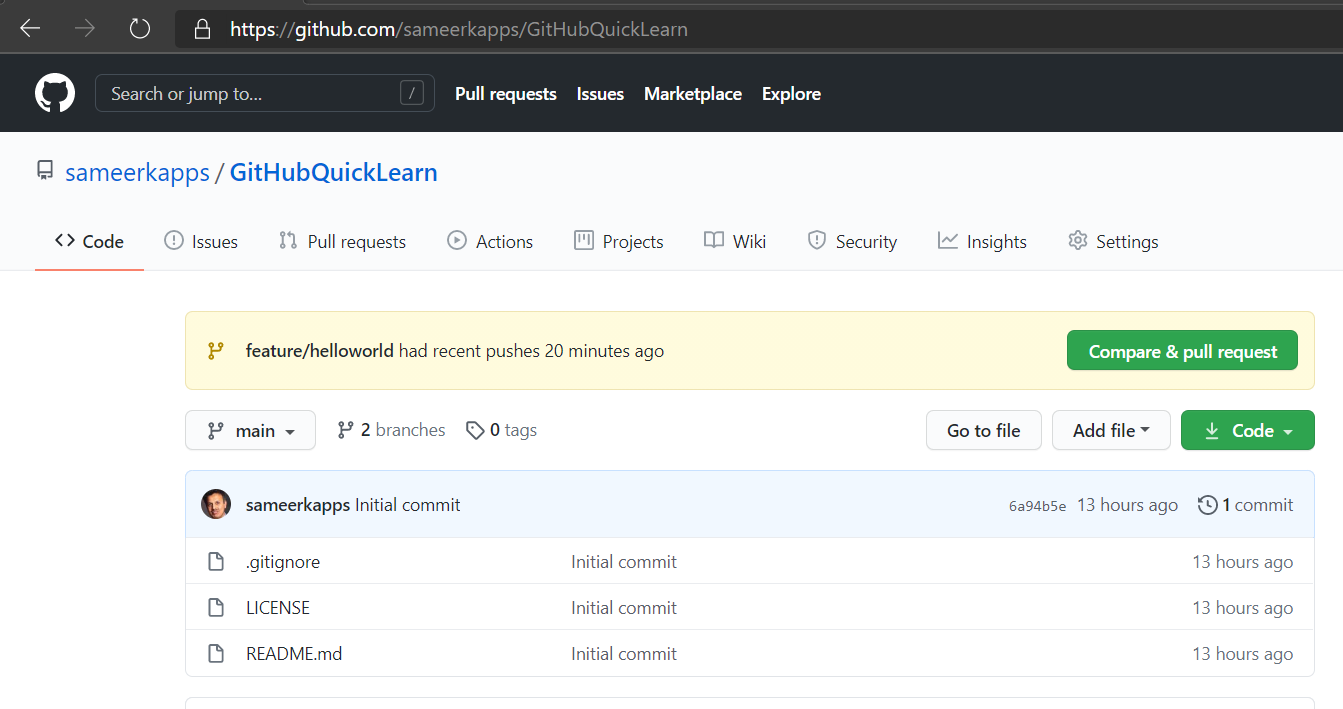
When you login on GitHub and go to the repository, it will ask you to compare and create a Pull Request:
Merge
Click on "Compare and pull request". It will take you to the screen allowing you to compare the files (scroll down to the bottom) and create a pull request.
Verify that the changes are what you want and click "Create pull request".
It will show your pull request in the Pull Requests tab as follows:
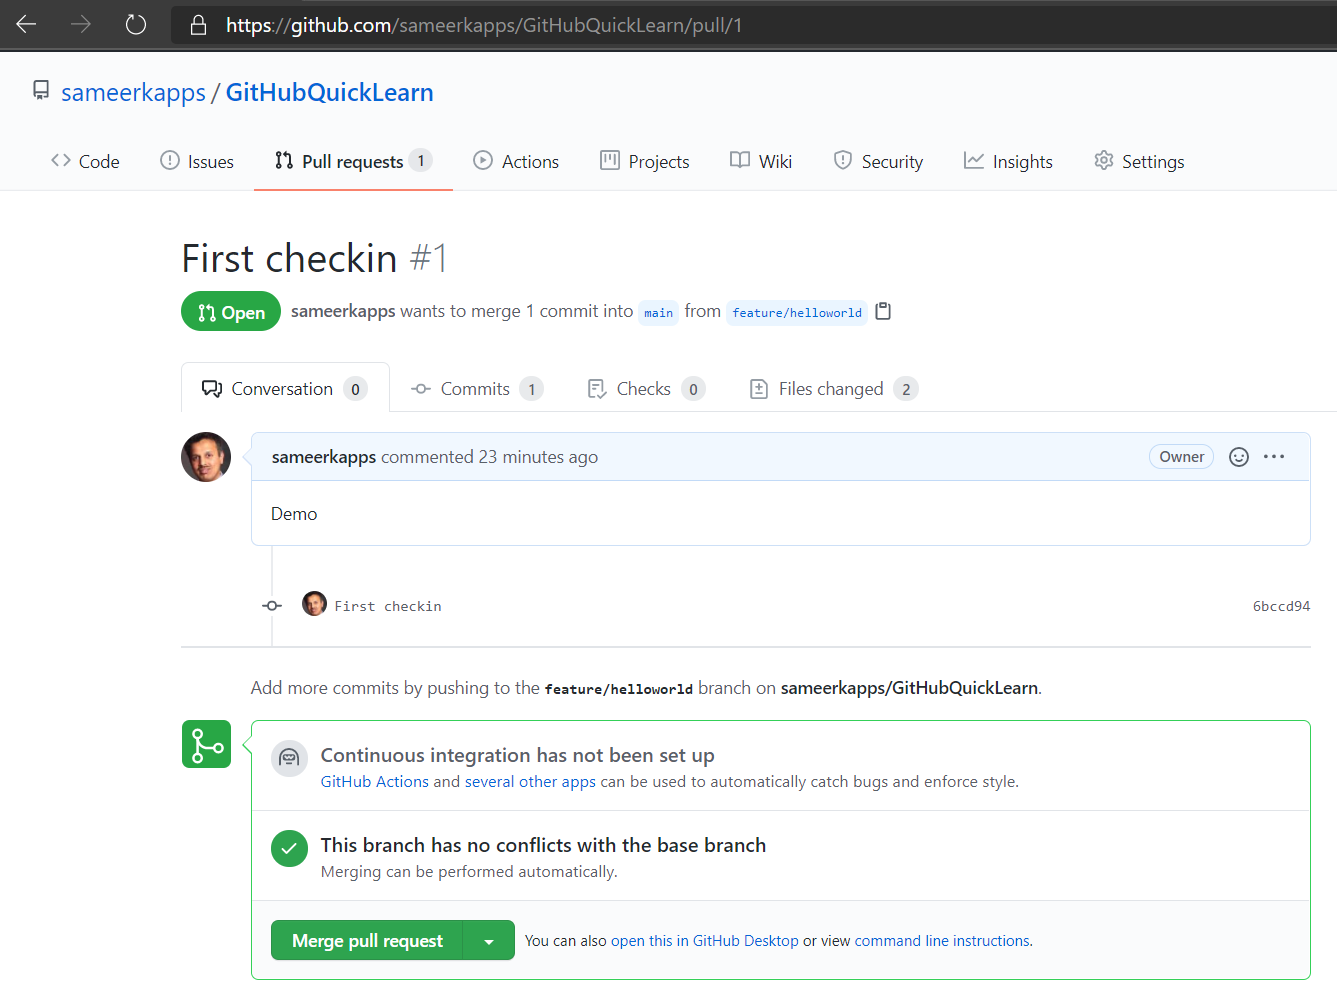 Any authorized person can Confirm and merge the Pull Request. This will merge your code in the main branch. It will also offer you to delete the branch that you merged. If you choose to delete it, it will delete the branch from GitHub, but not from your local machine.
Rebase Main
Your local machine will have the feature branch that you merged. However, the main branch on your local machine will not be updated to the GitHub version. To update your local machine’s version, complete the following: Show the list of local branches with the following command:
git branch
Now, switch to the main branch (note: no -b flag as you are switching to an existing branch and not creating a new one.):
git checkout main
It will now show a message indicating that the current branch has switched to the main, and may also show a message that your main branch is up to date with the origin.
Use the following command to delete the branch that you merged:
git branch --d feature/helloworld
To start new development, you may want to update the your main branch to the latest changes. This can be done with the following command:
git pull --rebase
Now you are ready to create a new branch and make new changes. All set!
Miscellaneous Commands and Processes
This section lists miscellaneous commands and processes that are used during software development.
Merge from main
While you are making changes to your branch (e.g. feature/foo), someone else might have made changes to main and you may want to merge them. This can be done as follows:
- Checkout main:
git checkout main
- Get the latest for main:
git pull --rebase
- Checkout your feature branch (feature/foo):
git checkout feature/foo
- Run the command to merge:
git merge main
This will merge the latest changes from main in your local branch. There may be conflicts, which can be solved by opening the folder in VS Code and merging them as desired.
View Commit History
To view the history of your commits, use the following command:
git log --oneline
Temporarily switch to another branch
There can be a situation when you are working in a branch, you want to quickly work on another branch; but do not want to commit or discard the changes in your current branch. Git can temporarily store and restore the changes using “stash” command. This can be done as follows:
- Stash changes in the current branch
git stash
- Checkout and work on the desired branch
git checkout <desired branch>
- Once those changes are committed, you can switch back to the previous branch
git checkout <previsious branch>
- However, this branch will not yet have the changes that you stashed. To restore the changes, issue the following command:
git stash apply
This will restore the changes that were stashed.
